Sunday, December 11, 2011

Mixing it Up!

9x24" sheet of white sulphite drawing paper
Mediums from left to right:
Uniball pen drawing, gouache collage stripe,
Generals "sketch wash" pencil,
Uniball pen, newspaper collage,
Gouache paint over brush pen sketch,
Collaged image with gouache paint addition,
gauche  and newspaper collage scraps with pen details
I spent this last Friday in my classroom demonstrating drawing (mark making) with multiple mediums for my advanced drawing students as a preparation for creating an expressive self portrait (their first project).  I had every possible art supply available for them and I worked on the small projects here as examples while they worked on their own small experiments using fruit as subjects.  

The goal was to get them to mix mark making materials and collage to create interesting and unexpected results.  Using fruit allowed them to quickly draw the subject and focus on mark making and experimenting with new mediums.  As I made discoveries I shared them and I encouraged them to do the same with each other, as sometimes what works or doesn't work is all a matter of perspective. 

The apples were mostly examples made while discussing techniques and properties of a particular medium while students watched.  The pears in the longer piece above was what I was working on after they all got to work.  I always love working along side my students and this little project took me through the day as I continued to explore and demonstrate mixing mediums together in the same piece of work.  Students also got to see me make decisions as I moved through the work, particularly as I got the the collage portions, as before i glued anything down I had several options that I played with on the page.
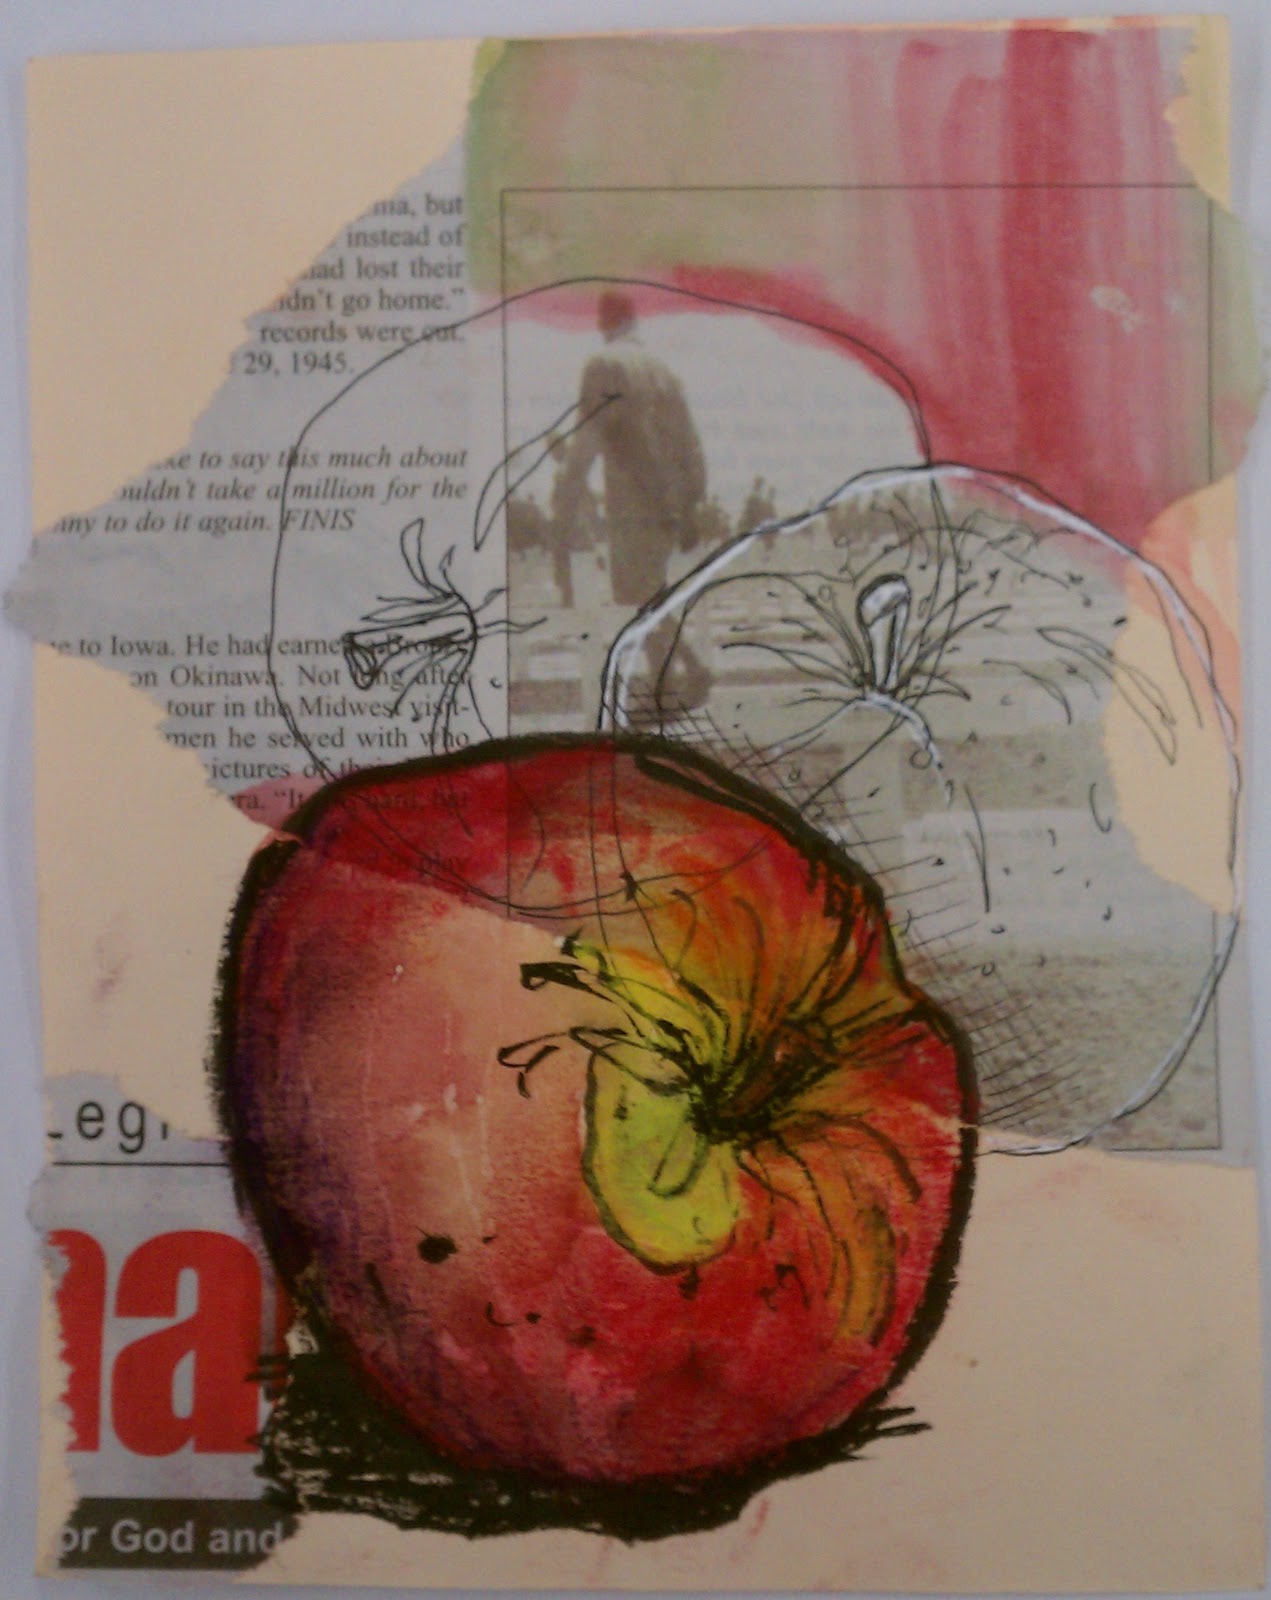
Cream Canson Mi-Teintes 
approximately 5x6"
Newspaper collage, 
Sharpie pen sketch with white gel pen accent,
Brush pen sketch with watercolor wash and soft pastel detail work 

As I worked I was experimenting with the idea of using multiple views of the same object within the same drawing.  I also knew I wanted to include collage, and was trying to encourage my students to do the same, although they were more reluctant than I was to try something completely new.  As far as new to me things from Friday, I used white gel pen, gouache, and soft pastels for the first time.  

 The colored apple on the example above was sketched with the Pentel Pocket Brush Pen; then I used some watercolors to paint the apple and the background a bit; next I used some pastels to add to the shadows and stem area and finished up with some more Brush Pen.  I like the way the pastel softened and intensified the color of the quick watercolor wash.  It along with the heavy line from the Brush Pen really pulls that apple to the front and makes a focal point, which is something we talked about doing particularly when using multiple drawings together on a page.

Canson Mi-Teintes paper about 5x5"
watercolor scrap collage, 
brush pen sketch, white gel pen sketch,  gouache
I did not particularly care for the white gel pen.  It was hard to sketch with because it did not roll smoothly on the page and I had to write very slowly to get good lines on the paper.  I also feel that the collaged together colors did not work well for me and this is my least favorite from the day.  I had a student try the water soluble oil pastels on black paper and his apple on black was stunning.

Backside of the above sheet
Sharpie pen sketch with gouache
Because I did not like the side with mostly black paper, I decided to flip my sheet and explore gouache and my Pentel Pocket Brush pen on the back and I fell in love.  Fell in love with the brush pen all over again, which made me wonder why I had taken it out of my bag.  It makes such a beautiful line on the page, I used it for the rest of the day and it went back in my sketch kit.  I am also loving gouache!  It is a fun combination of watercolor washy fun and acrylic paint opacity that also holds some brush marks. I was recommending everyone try the gouache for the rest of the afternoon.

Strathmore Mixed Media paper about 5x5"
water soluble oil pastels, 
sketch-wash pencil, 
Pentel Pocket brush pen  sketch 

This apple was worked on quickly and in layers while I walked a few students through some of the different materials they had never tried before and I wish I had thought to take photos long the way because it changed three times.  I started the sketch with General's sketch-wash water soluble graphite pencil, which works just like regular pencil but you can wet it with a brush and water which creates a graphite colored wash (grey shadow under apple).  Then, I had a student pick up a box of water soluble oil pastels I found in the supply closet and wanted to know how they worked, so I tried on my apple while she watched.  They color like crayons and then with clean water and a paint brush they turn into paint.  She liked the effect and took a set to try (yeah!).  Then I experimented with black ink and a small paint brush to see if I could replicate the effect of my Pocket Brush Pen for my class, seeing as I have only mine and many of the students liked the line I was making with it.  I feel like the ink and brush drawing has much the same effect as the brush pen but it is not as convenient if you want to travel although my students liked it and many gave that a try too.
I had originally only planned one experiment day but after having so much fun Friday and after seeing how hard it is to get them out of their comfort zone, we are going to experiment for another couple of days before beginning the self portrait project. I really want unique work from them and feel that a few days playing with supplies that are new will be time well spent in terms of getting my students to create something that is fun and uniquely theirs.

Wednesday, November 30, 2011

Oranges

This week is a crazy one. Apparently sketching fruit is soothing and lends a certain calm to my afternoon (this is my third simple fruit this week).  The shapes are simple and familiar, the colors bright, and the sketch, plus painting can be done in about fifteen minutes, which doesn't add any time pressures to my already busy week.  I found today the act of stopping and sketching (plus eating the orange) gave a nice lift to my afternoon and gave me a fresh start at my task.
Go sketch.  Trust me, it will feel good.

Tuesday, November 29, 2011

Everyday Object


Sometimes it is all about taking a twenty minute sketch break after grocery shopping. As I unpacked my produce I realized it had been far to long since I just sat down and enjoyed something because it was beautiful.  And I can not think of a better way to enjoy beauty than to look at it close enough to make a sketch. 
A simple sketch, done quick and my whole afternoon was better.  I love when that happens.

Sketch in sharpie marker (fine point), Grumbacher watercolor wash, handmade sketchbook (Rives light).  Twenty minutes well spent.  Sketch something - today!

Thursday, November 10, 2011

Self-portrait with textured background

 I have been working out the kinks in a new project I am having my students work on using watercolor paint, transfers, portraiture and working over a prepainted/textured background.  In the process of doing a new project, I will typically create the work myself to gain knowledge of problems they will encounter as well as to have an example of what I am expecting them to do.

For this project, students started by gathering song lyrics, poetry, and images that they could transfer (using a chartpak marker)  onto the page for some texture and hidden imagery later when the portrait was complete. I did not think ahead to photograph my work at this early stage; you can see the transfers through the paint in the image below, they are the black markings, which are actually stanzas of song lyrics and the owl face.
 After the transfers, they were told to pre-paint their paper using watercolors, using the texture technique of their choice (plastic wrap, paper towel, sponge, splatter, salt) and a cruciform page layout, using two colors either complementary or analogous.  I used a dark blue and a burnt umber for a complementary color pairing, with the intention of painting my portrait using a monochromatic color scheme using the burnt umber.
In the image below you can see my painted portrait about mid-stage on the above background.  Again, I wish I had thought to take more photos as I was working rather than when I was done for the afternoon, so my process was more completely documented now.  I began my portrait by painting in shadows using the same blue as in the background and a tiny bit of payne's gray.  Then, I began using the burnt umber and some payne's gray to continue to build a likeness.  At this stage I also used the blue again to define the edges of my shoulders so I did not just have a floating face on the page.

I had intended to have a monochromatic version of my portrait that was unified with my background color and was super surprised as I worked, that by using the burnt umber, I was in fact creating a realistically colored portrait of myself.  
(As a note: this has been a weird hang up for my students.  I am telling them to choose a color from or close to one of their background colors and paint their portrait using a monochromatic scale to follow the values in their photo/face, and then they see mine and say "but yours is real and I can't mix skin color".  To remedy this problem, I began a new portrait (using green) and I have also shown them that the colors I used (deep blue and burnt umber) mix to make a brownish color on an additional sheet of paper.  This seems to have helped and this week in class their projects are coming along beautifully.)
After I completed the portrait by adding in the eye details and adjusting some color in the eye brows, I went back and added more transfers to the background.  I found some gears and cogs, along with a few owl drawings from my sketchbook that I copied on a photocopier so the marker transfer process would work.  At this point I felt like the portrait was finished but I left it at my desk so I could look at it a couple times a day and I felt as I looked at the completed image that I needed to go back into the background one more time with a bit more of the burnt umber and expand the umber color around my head and in the top of the page.  I am hoping to make these additional changes soon, but unfortunately they have yet to happen.  
If I change the background I will add a new image but for now, know it  looks as done as the image below, and that my students are enjoying the project and that it has spread (a bit like a fun and fascinating virus) to include some advanced independent study students in another class of mine who are seeing it done and exploring the process themselves "because it looks cool".


Wednesday, November 9, 2011

Owls on my mind


So lately I keep drawing owls; they just keep coming up in my work. Maybe it is because we have a pair of owls in our yard and I frequently see and hear them or maybe it is because they are really beautiful and interesting birds. Who knows.
I have decided that I am going to use them to create an Artist book to enter into the "Foot in the Door 4" show at the Minneapolis Institute of Art.
This owl is a charcoal drawing I did in my classroom while my students worked the other day and I think will become part of the book. As I work I will try to post bits and parts.

~ A tiny note . . .  
This post is from two years ago in November and has moved itself to here after I edited through some old draft posts.  Strange, but not worth deleting the post - just know it is old and has reposted itself fresh.

Sunday, November 6, 2011

Adventures in Screen Printing


I have donated my time and art work to complete a month in the upcoming calendar fundraiser for MCBA.  For the last two weekends I have been printing little February pages using my Yudu screen printer, not without some trails and tribulations of course.  The system works really well, once you have the 220 mesh screen (it comes with 100 mesh, not made for detailed images), if you use Speedball ink (I also tried the Golden silkscreen medium and I avoided the Yudu ink as it has gotten some rotten reviews online and I was working on paper), and when you buy a new squeegee (the one it comes with is hard plastic with no rubber edge).  I also discovered today that I prefer to use the screen taped on my table rather than in the awkward, stiff hinged top of the system itself.  
I think I may finally have one hundred clean prints and can move on to the next project, both with the screen printer because now I have the hang of it, and in my studio as currently every flat surface is covered with drying pages and it will be a relief to stack everything up and drop the pages off to become a part of the 2012 MCBA calendar. 


Wednesday, November 2, 2011

Monochromatic Owl

 8x10 inches, acrylic paint on gessoed canvas
In the painting class I am teaching we switched gears and began working in acrylic last week.  I always love when teaching a topic takes me into territory that I do not regularly travel through, as is true with acrylic painting.
I very rarely work in acrylics and I am enjoying the change of pace and sense of experimentation that changing mediums and instructing new painters has brought me this week.
This little green owl came about as we are beginning our first actual painting using a monochromatic color scheme.  This began as a demonstration for transferring an image and beginning to assign colored values to a painting from a black and white reference image and I just had to complete the entire thing this afternoon because it was just too much fun to paint.  I may just have to do another acrylic painting, something I rarely do, just to have more fun with painting in a "new" medium.